
Creating images
You can create images on LINE Official Account Manager for web browsers.
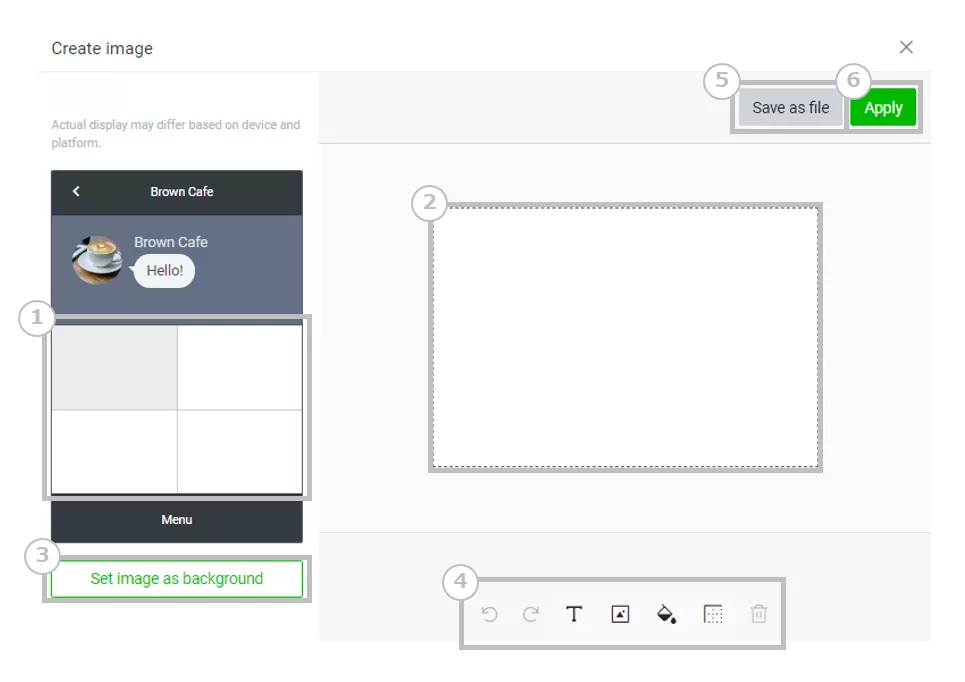
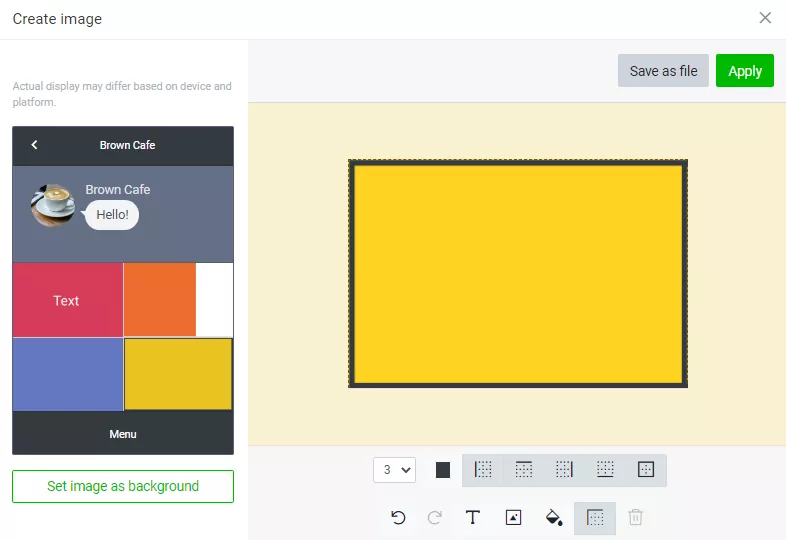
| No. | Description |
|---|---|
| ① | Image preview Click a section to edit. |
| ② | Image editing area Appears for the template section that you have selected. |
| ③ | Lets you upload an image as the background of your entire rich menu. |
| ④ | Editing tools From left to right, the editing tool icons are: • Undo • Redo • Add text • Upload image • Add background color • Add border • Delete (This deletes the object you have selected) |
| ⑤ | Saves the image you created as a file. |
| ⑥ | Applies the image you created. Important: Once you apply an image, you can no longer edit it or save it as a file. Be sure to click Save as file before applying your image. |
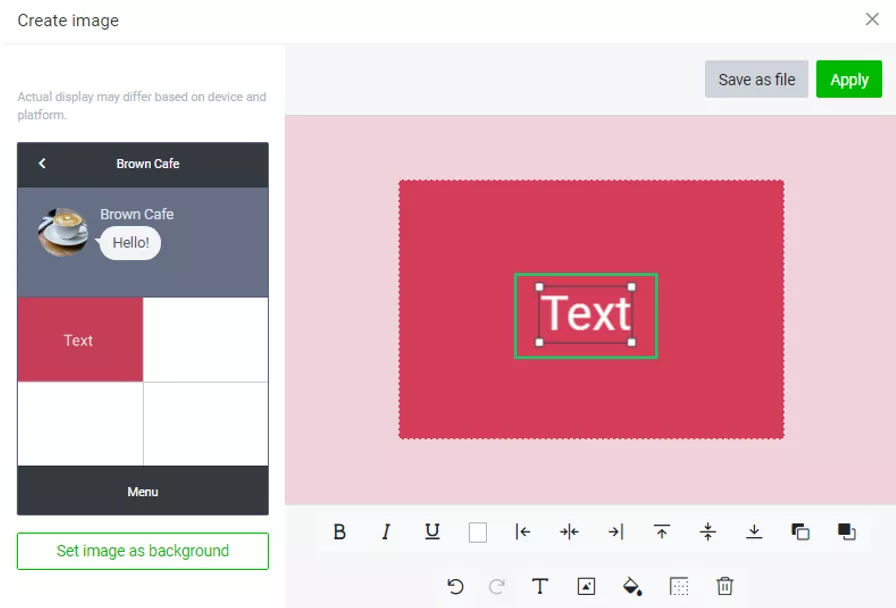
Click Add text to enter and edit text in the image editing area.
From left to right, the text editing icons are:
• Bold
• Italic
• Underline
• Text color
• Align left
• Center horizontally
• Align right
• Align to top
• Center vertically
• Align to bottom
• Send backward
• Bring forward
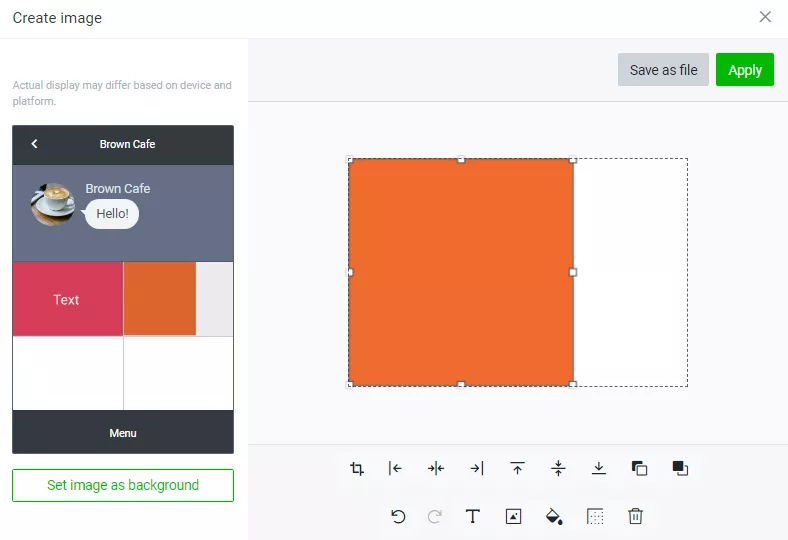
Click Upload image to upload an image to the section you have selected. You can also resize uploaded images in the image editing area.
From left to right, the image editing icons are:
• Crop
Note: After selecting the area that you want to appear, click Crop again to crop the image.
• Align left
• Center horizontally
• Align right
• Align to top
• Center vertically
• Align to bottom
• Send backward
• Bring forward
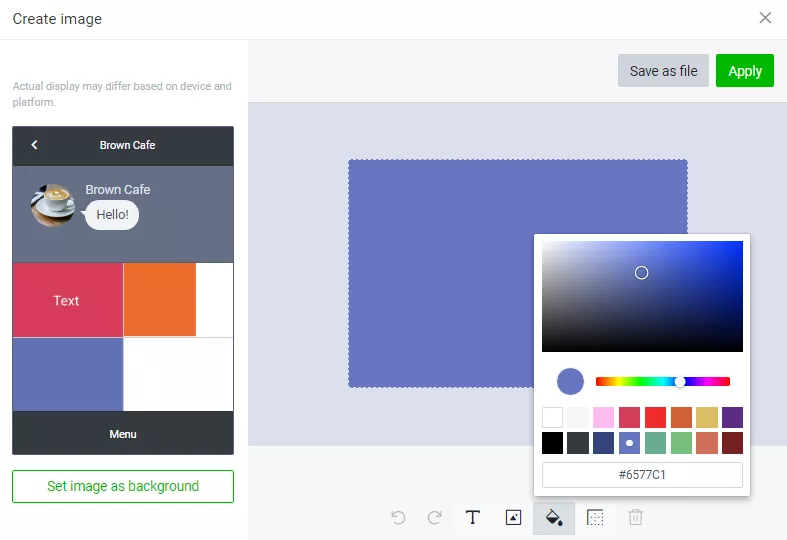
You can change the background color of each section in your image. To do so, click Add background color and choose your preferred color.
Click Add border to put borders around each section of your image.
From left to right, the border editing tools are:
• Border thickness (drop-down menu)
• Border color
• Border left
• Border top
• Border right
• Border bottom
• Border full